Showing posts with label crafts. Show all posts

Friday, September 28, 2012

DIY Embellished Shades

 DIY embellished sunglasses are everywhere right now, folks. Inspired by runway looks such as Marc Jacobs, Prada, and Dolce & Gabbana, sloughs of fashion bloggers have been posting creative tutorials on how to spruce up your sunnies for cheap!

It goes a little something like this:
Steps 1-3: Hot glue a ton of sparkly shit to your sunglasses.
Step 4: Wear them and be fabulous.

(Top left to right, click for tutorial: Glitter n' Glue, Refinery 29, Studs and Pearls, A Matter of Style)
(The ladies at Nissa Jewelry added some chains to their sunnies- expect to see more of these)


The beauty of this project is that you can be as subtle or outrageous ad you'd like. Pictured above are seed beads, cabochons, nail decals, and even repurposed earrings! Istanbul has a sad lack of craft stores... but it does have a CRAFT DISTRICT. And you can bet that I'll be there this weekend with a keen eye for anything that might look great on a pair of shades. I have a feeling it will be sparkly.

What do you think of these DIY eye candies? Would you rather stick with your unadorned wayfarers?

Wednesday, June 1, 2011

Berit's Etsy Shop Now Open!

So, guys, I know I've been inexcusably MIA lately... but I haven't been doing nothing!

I'm very, very excited to announce that I've opened my own shop on Etsy! I've wanted to for a long time now, and this break in school has allowed me to spend some time crafting.

Please take a look around, tell your friends, and please let me know what you think! Click on any image to view it in the shop.


I've been a long time advocate for Etsy and the support of grassroots artists through it, so it's exciting and a little scary to have finally taken the plunge!

Love,

B

Thursday, September 16, 2010

Ms. Berit Homemaker? Awkward.

I've been at school nearly two weeks now in the new apartment and I have to say, it's finally starting to look like home! Not only that, but it's FANTASTIC to have our own kitchen...

All summer we were so excited to do some decorating, and here are the highlights!

(Huge Ball canning jars to keep the sugar, flour, and coffee in, tied up with ribbons! The jars were $4 each for the half gallon ones and the ribbon was $1 a spool, all in all about $12 to create cute storage space for baking ingredients! Also reminds me of when we used Ball jars as drinking glasses when I was little.)

(Scrabble letter magnets for the fridge)

(dragonflies on the wall)

(Tibetan prayer flags and prints from my brother's girlfriend, who is a graphic designer!)

(vintage table cloth from mama)

Aaand... banana bread muffins with granola!

Now if only the boy was here...

-B

P.S. Went on a trip to Michael's. My wallet got pwned.


Tuesday, August 24, 2010

DIY: Magnetic Scrabble Letters!

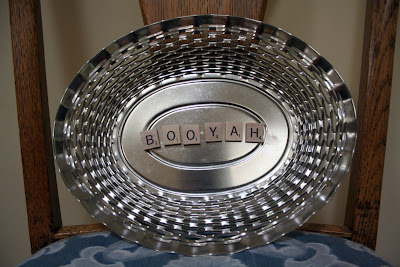
My mom loves scrabble letters. She's picked them up at thrift stores over the past year and has a set sitting on a bowl near the front door and arranges them into cute phrases, like this:

(Waiting for me after I came home from my first year of college)

There being about four sets of scrabble letters in my house, mom gave me some to take with to school to put on the coffee table. I decided that they would get more use as magnets, on our fridge!

All it took was a pair of scissors and a trip to the hardware store to buy a few feet of magnetic strips (with adhesive on one side, so no glue gun required!) for about $2.00.

Cut the pieces to about 3/4 of an inch, or whatever best suits the length of the Scrabble piece.

Secure the little magnets to the Scrabble pieces by removing the adhesive covering and pressing them firmly to the back of the Scrabble square.

-- And booyah! Cute magnetic Scrabble pieces for your fridge, white board, or what have you.

The total budget for this project is somewhere around $5.00 :)

-B


Thursday, August 19, 2010

DIY Bow Cutout Shirt!


The other day I was browsing an online boutique that will remain unnamed when I spotted a t-shirt that was adorably over-priced and immediately had an, "Ahh, I can do that!" moment.

I bought a cheap t-shirt from F21 and will probably try out a few other ideas on more shirts, especially when they're are 3.50 a pop!

Here's how to do it!

1) Mark with a pin where you'd like to cut the shirt (it might help if you do it while the shirt's on you, it'll help you determine where the bow will lay)

2) Create a template for each half of the bow. As you can see, it doesn't have to be perfect, the t-shirt won't hold the triangle shape perfectly anyway. Keep tweaking the size and shape until you're happy with it!

3) Trace your bow-shape onto the shirt (make sure to put a piece of paper between the layers of the shirt to prevent bleeding!), leaving an inch or so between for when you tie the center.
4) Cut the shirt! trim as you see fit.

5) Use a length of narrow lace or ribbon to tie the center and let it hang as long or short as you want.

The end result! Forgive the gloriously awkward photo :3

Craft away, my loves!

-B

avandia recall